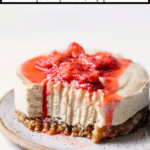
No Bake Vegan Cheesecake
This post may contain affiliate links. Please read our disclosure policy.
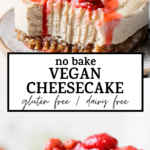
No bake desserts are the best, and this no bake vegan cheesecake might be my favorite no bake recipe. The crust is made with nuts and maple syrup, and the filling is cashew-based, lightly sweetened and pairs perfectly with a fruit topping.
Everyone loves no bake desserts, right? RIGHT. As much as I love regular cheesecake, it can sometimes feel a bit…heavy. This vegan cheesecake is lighter but still very filling, perfectly sweet and very easy to prepare.
Why you need this vegan cheesecake
- It’s a no bake cheesecake recipe, making it fool-proof
- The flavor and texture is incredible–smooth with a mild sweetness from the maple syrup
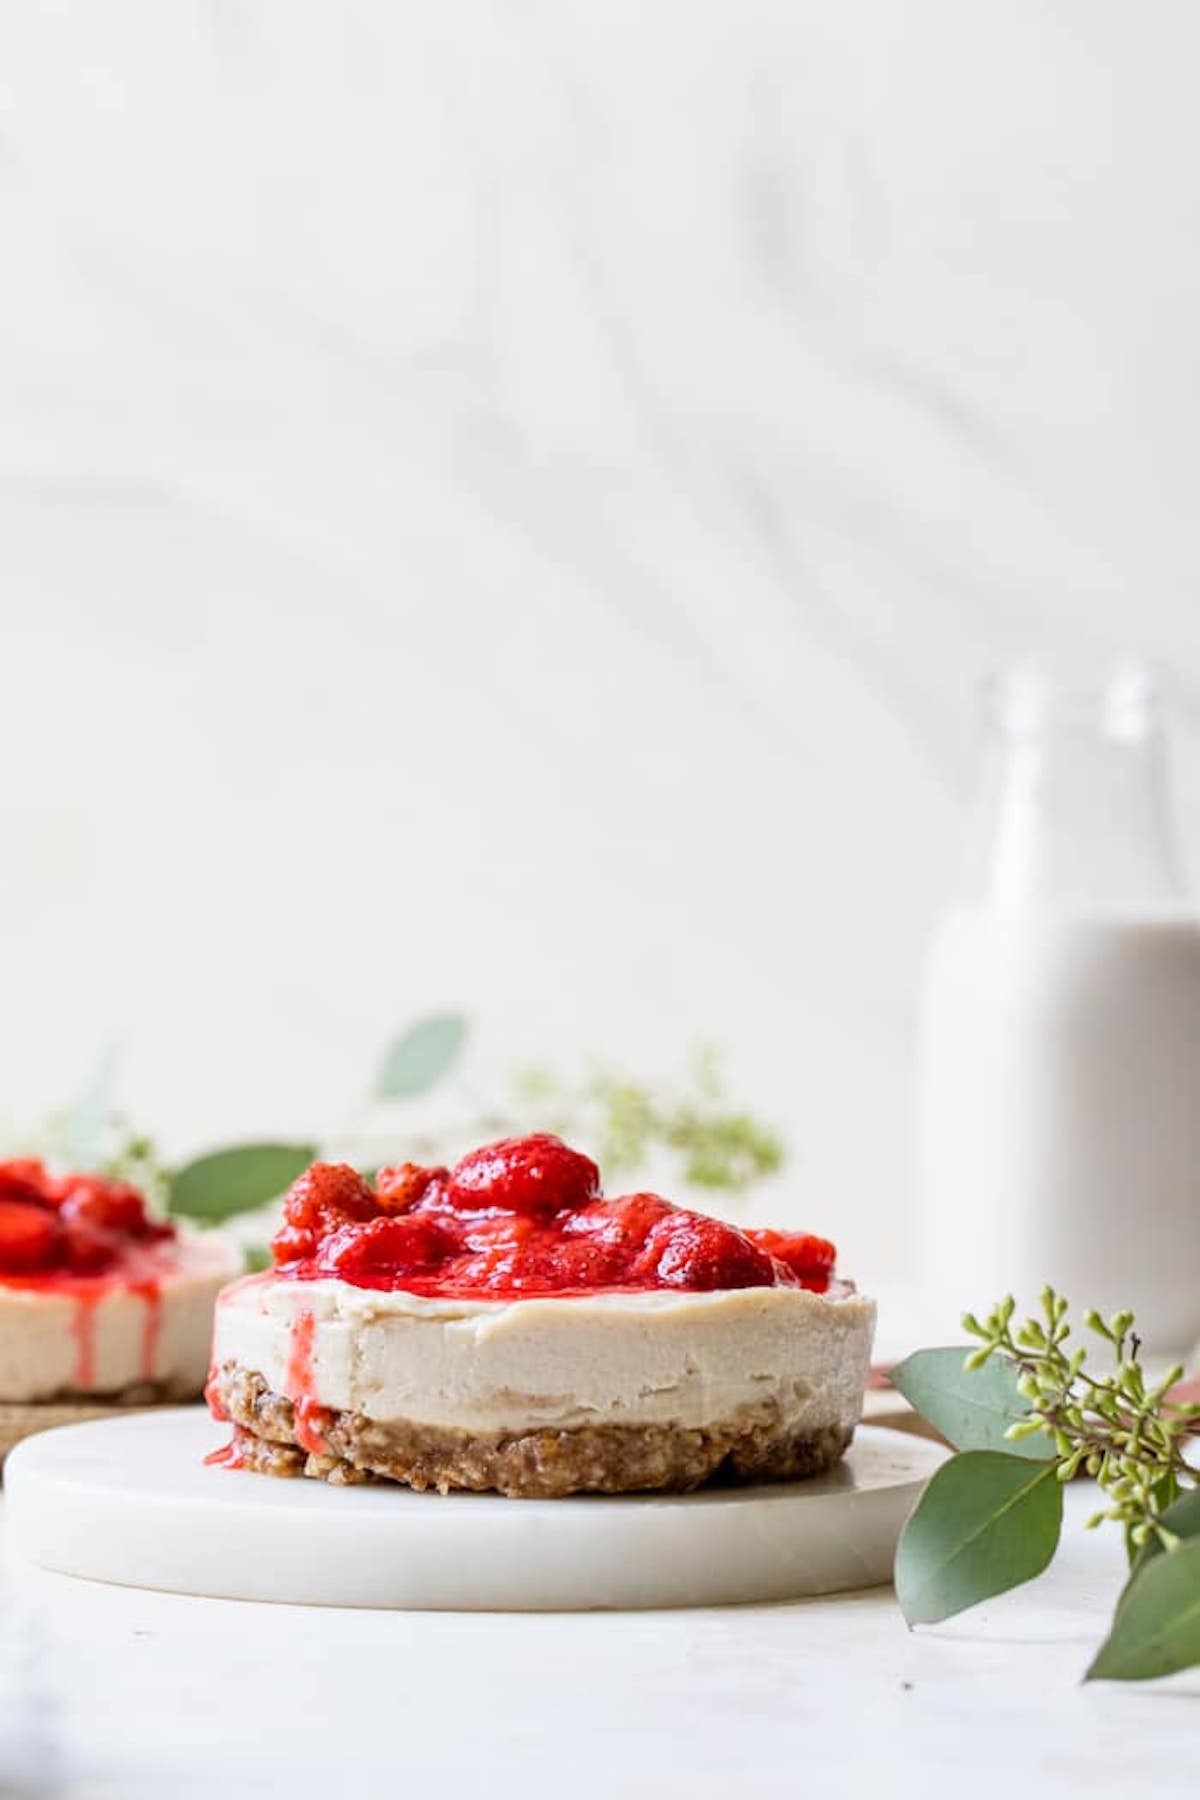
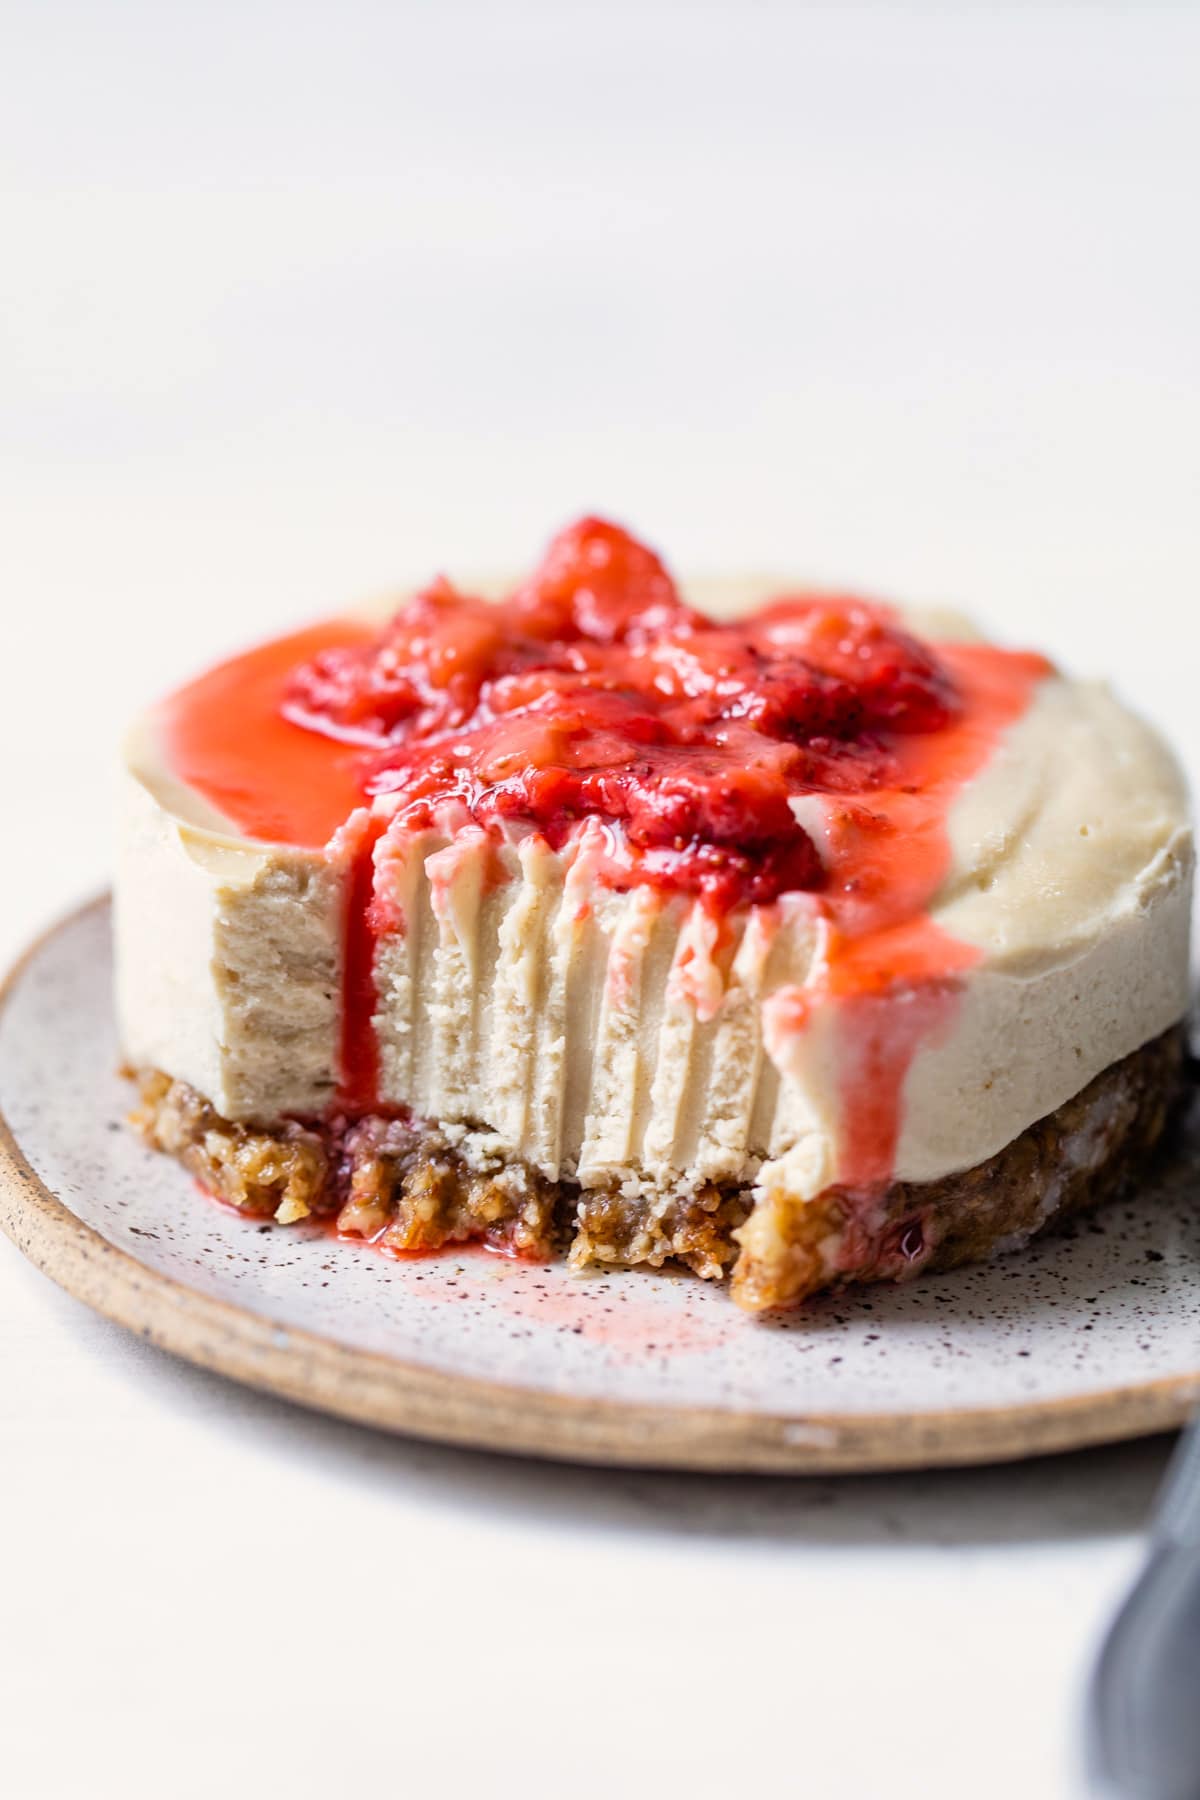
- It’s even better when topped with an easy strawberry compote
Ingredient notes
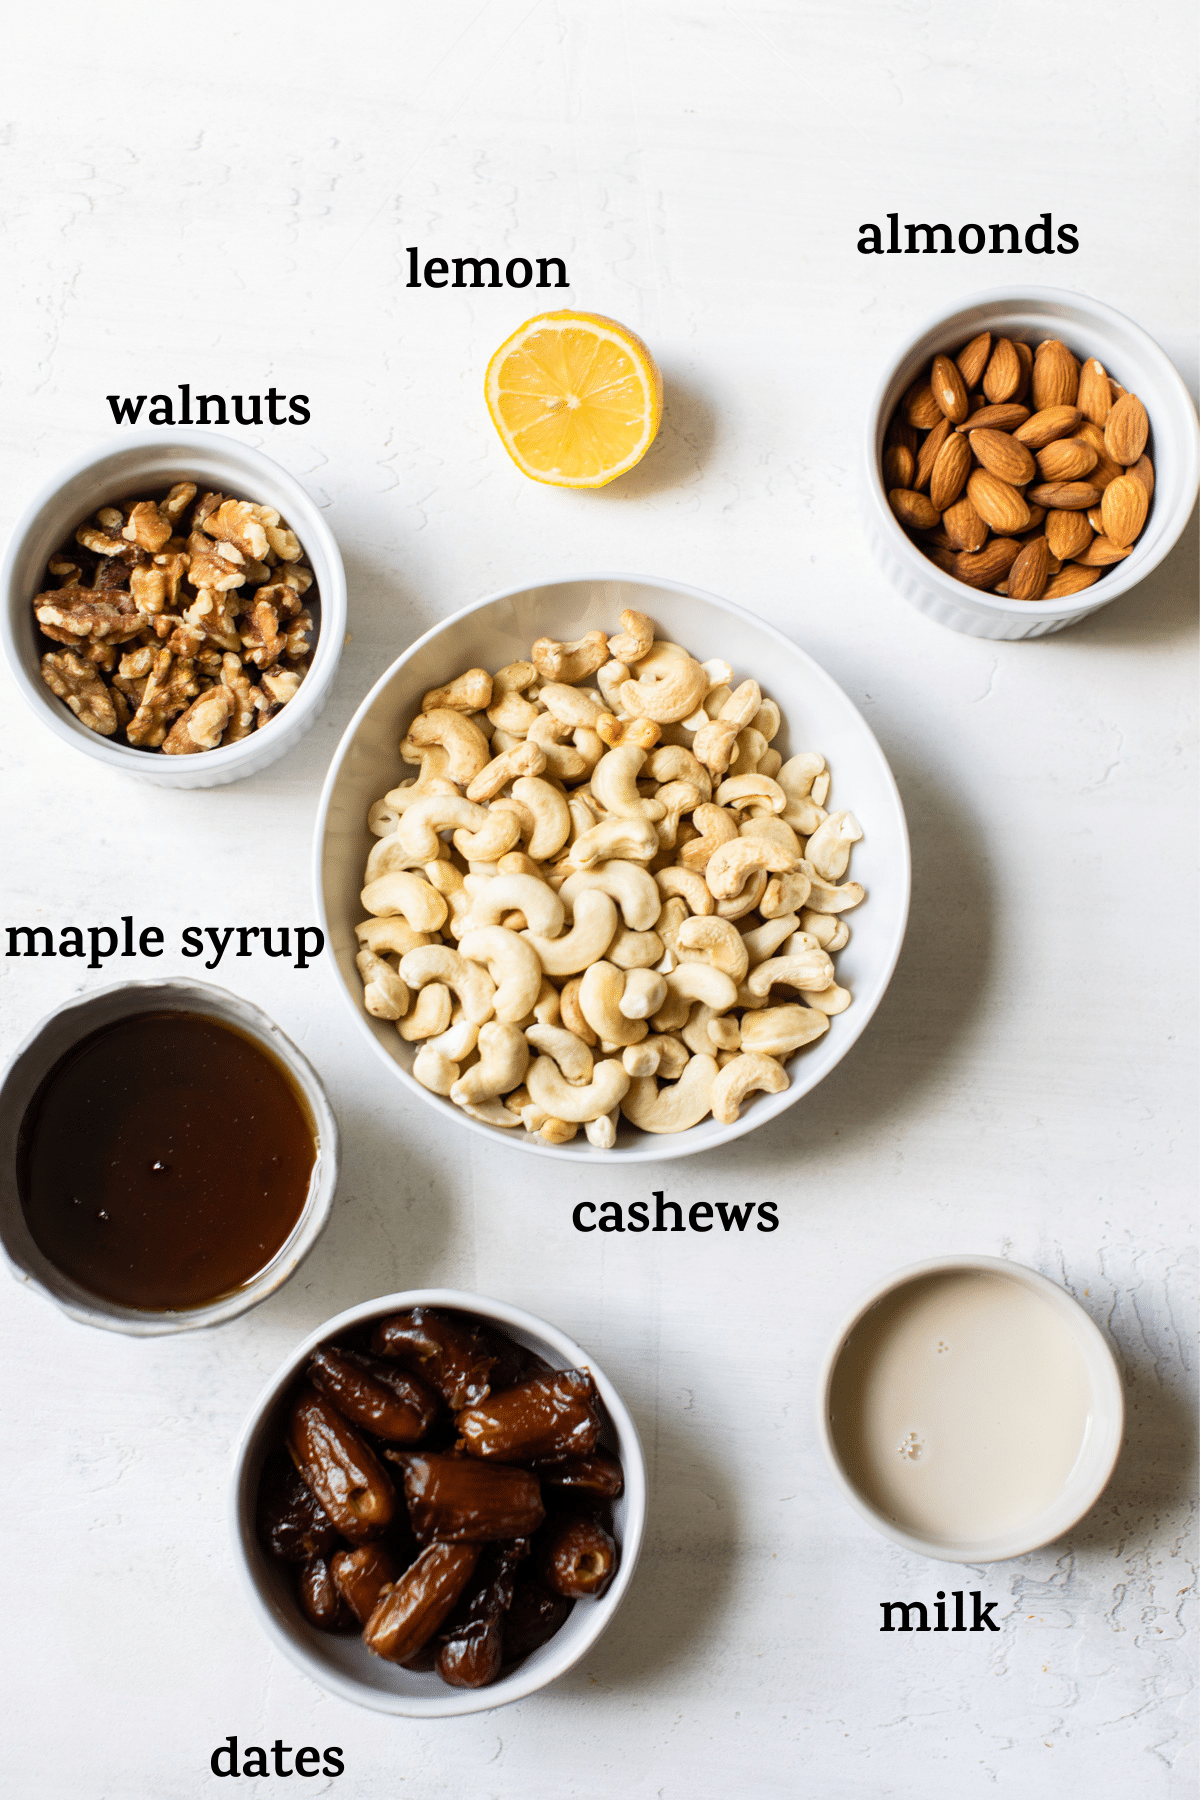
Walnuts and almonds: The crust of this cheesecake is nut-based, and I opted to use almonds and walnuts, though technically most nuts should be ok. If you are looking for a substitution, try pecans or macadamia nuts.
Dates: Dates are crucial in many vegan no bake desserts because they act as a binder that holds everything together. Plus, they add some sweetness to the crust of this cheesecake.
Maple syrup: Similar to the dates, the syrup is a form of sugar (which you need when making cheesecake!) and it helps to bind the nuts together and form the crust.
Cashews: The bulk of the filling is made from blended raw cashews. Why? Because cashews are super creamy when blended and have the most neutral flavor of all the nuts. Be sure to use raw cashews, not salted.
Lemon: Adding a little bit of lemon juice helps to balance the flavor and allows this vegan cheesecake to taste slightly more like traditional cheesecake.
Almond milk: The milk mixes with the cashews and creates a smooth and creamy texture. If you want, you can sub oat milk, coconut milk or soy milk instead.
Step-by-step instructions
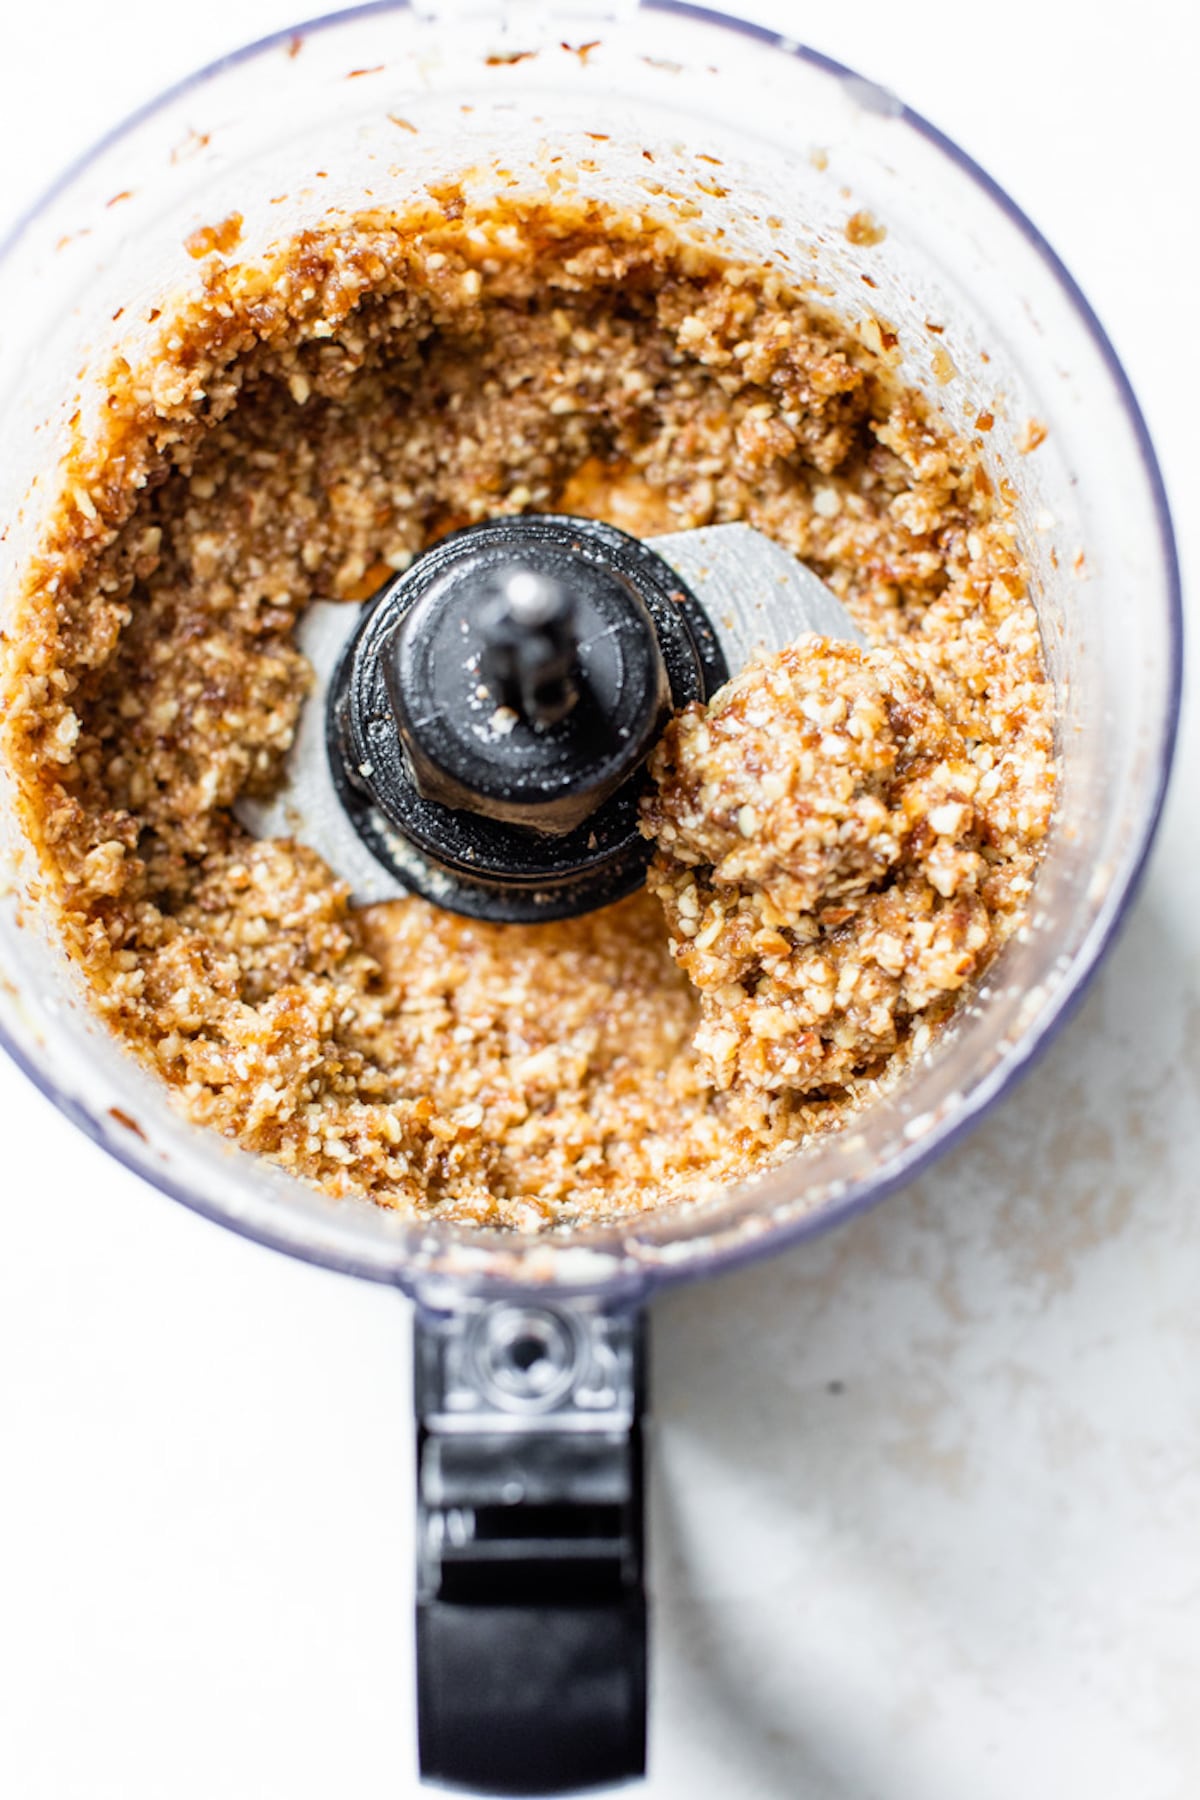
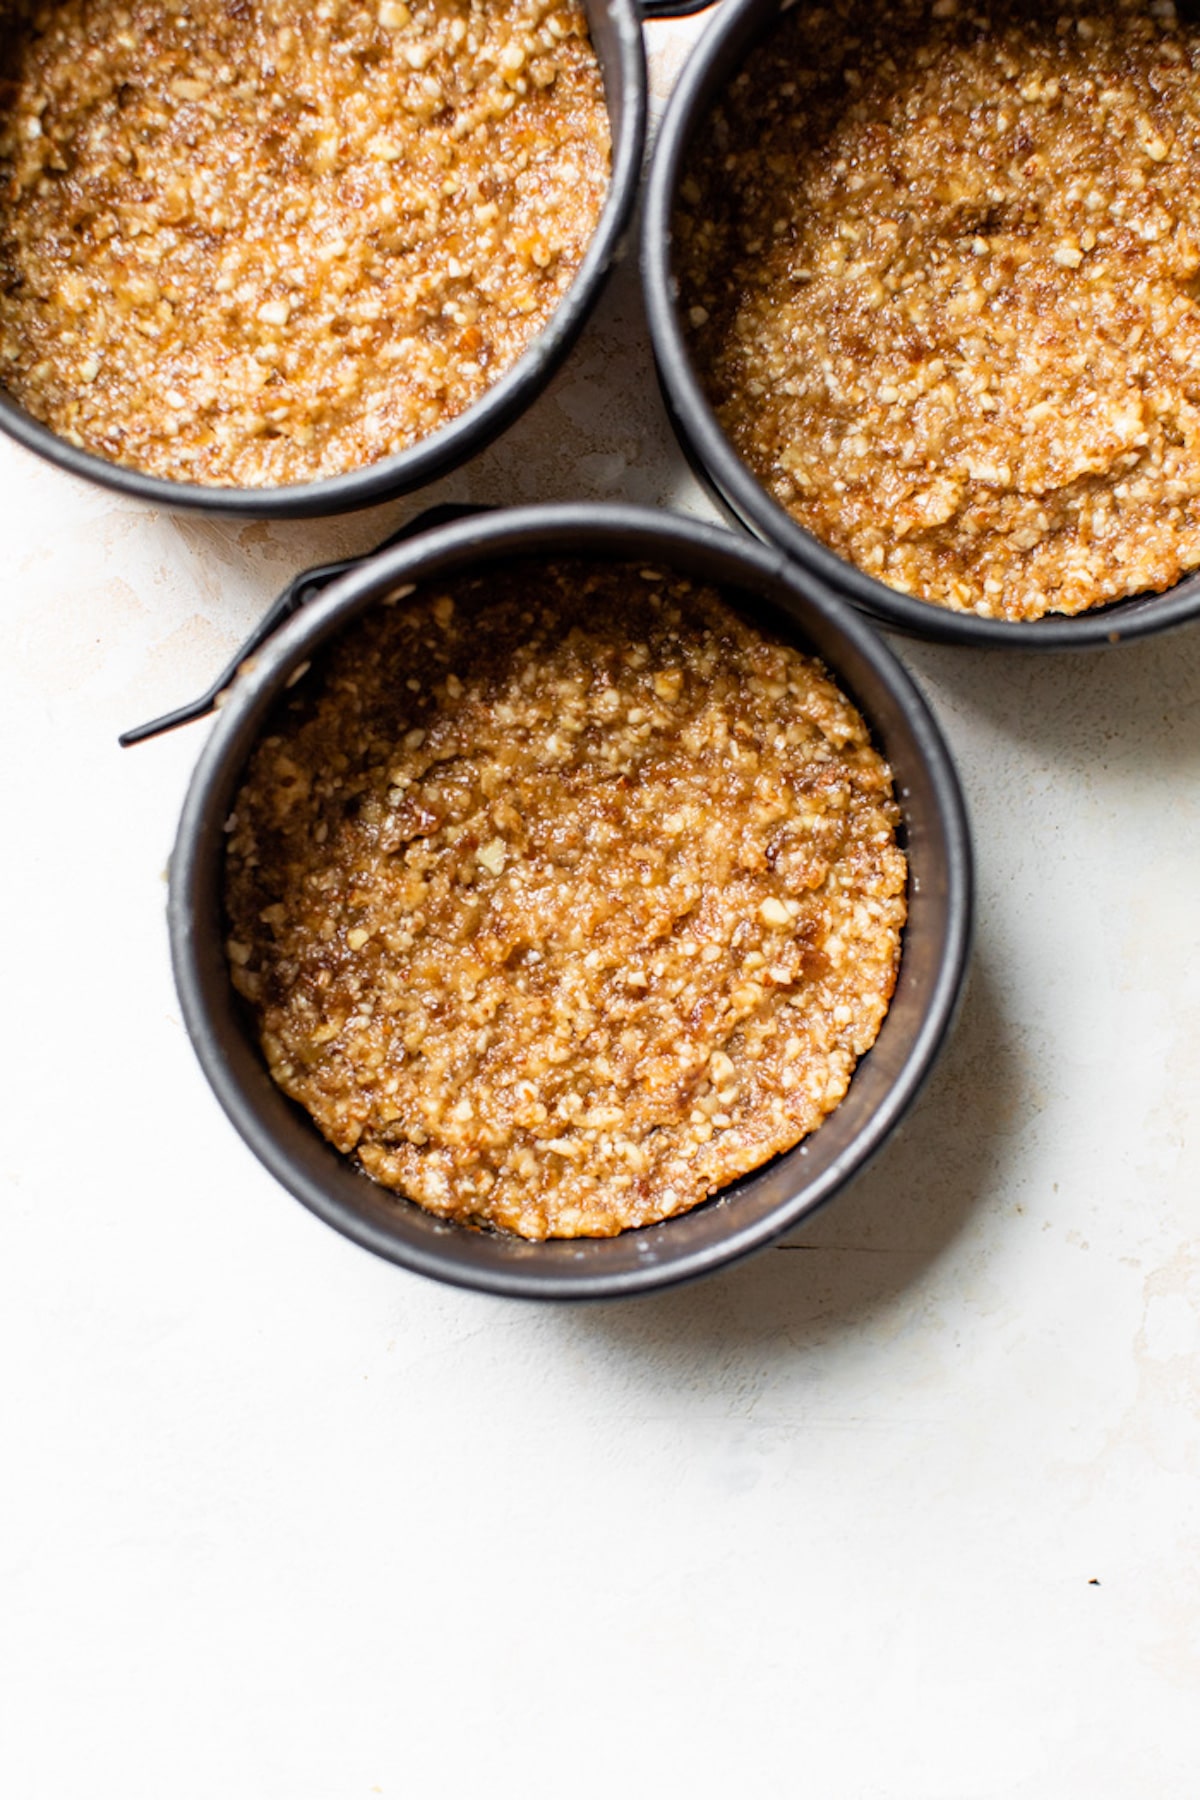
Step 1: Make the crust by adding all the nuts to your food processor and pulsing for 10 seconds, then the dates, and lastly the maple syrup. If you don’t own a high quality food processor, you might want to do this in two batches so you processor doesn’t get stuck.
Step 2: Once the mixture is formed, grease your springform pan(s) with coconut oil, then use your hands to press the crust down into the pans.
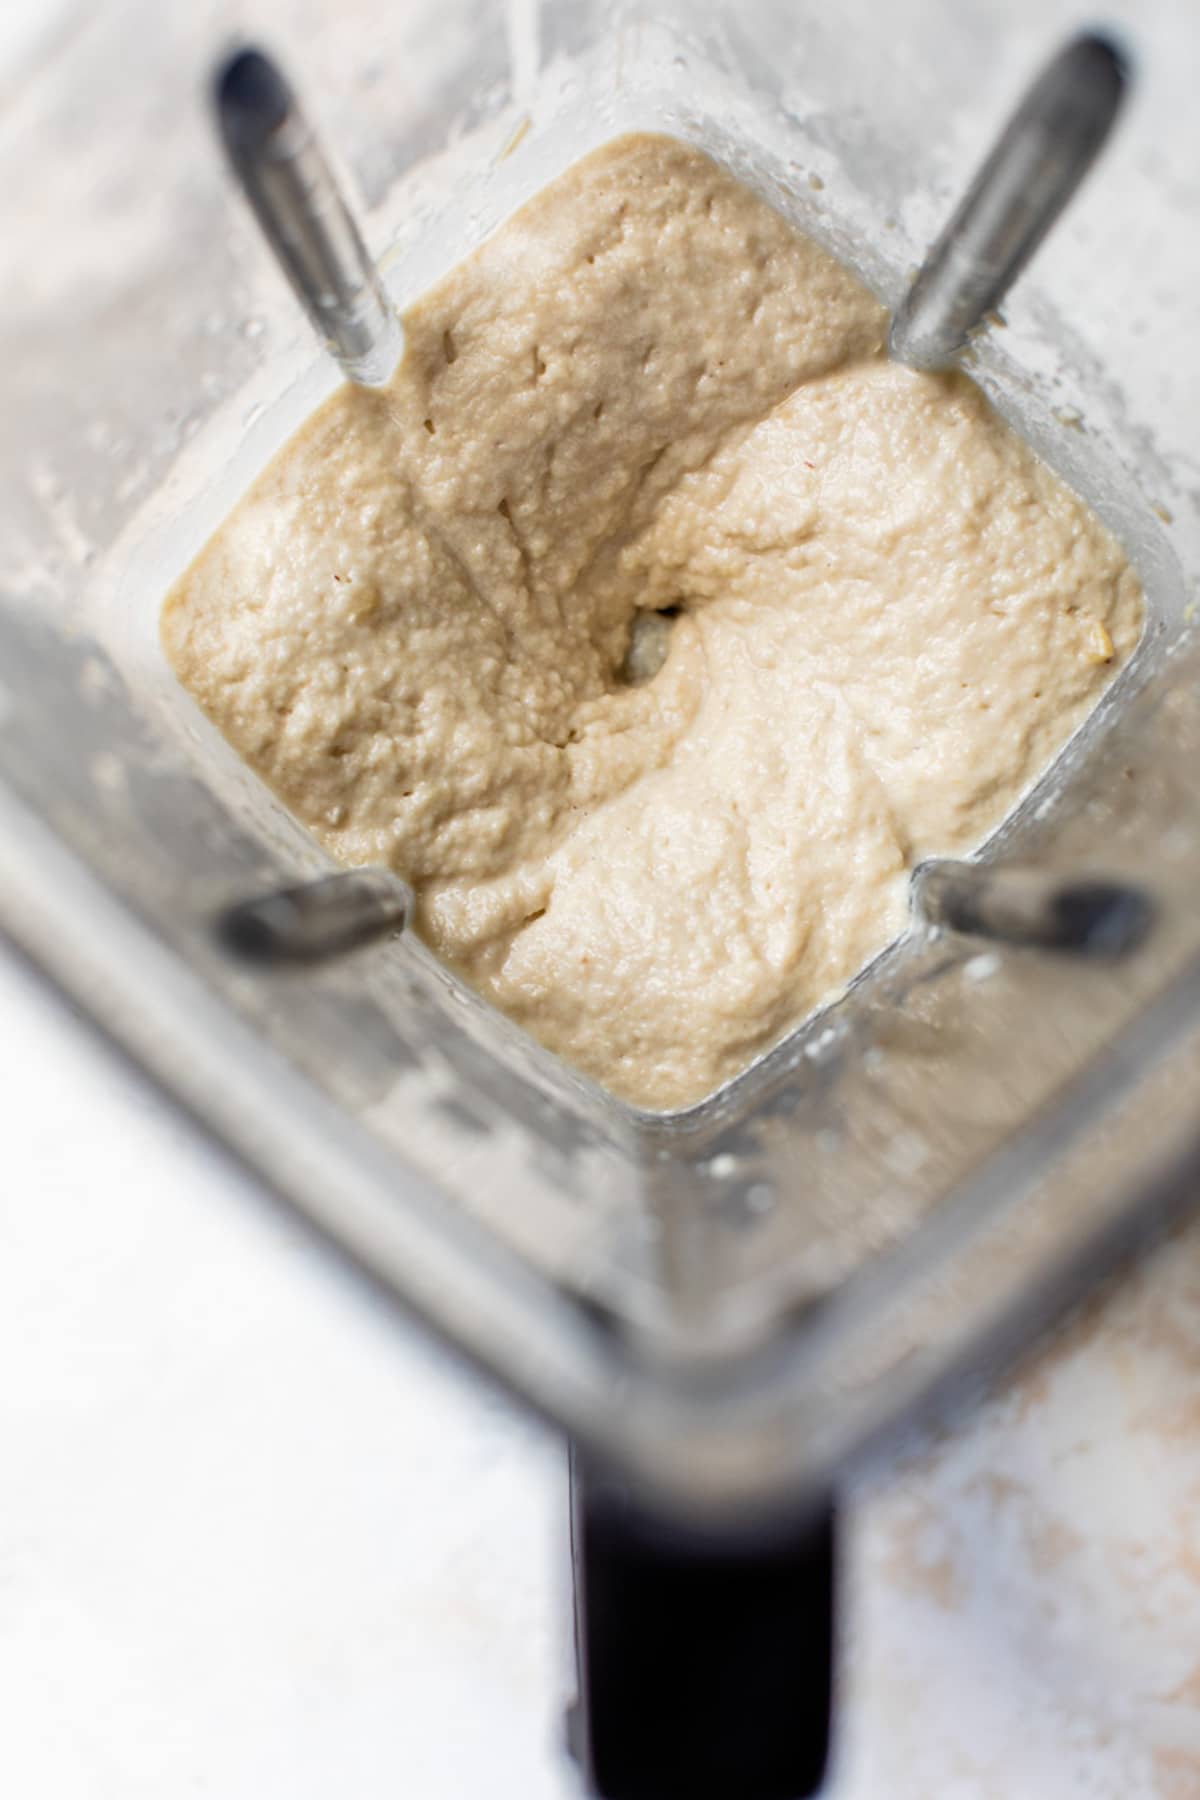
Step 3: To make the filling, add the cashews, lemon juice, milk, and syrup to a high power blender (I use a Hurom) and blend until smooth. You might have to stop and scrape down the sides a couple times. If the mixture still doesn’t want to completely blend, add 1-2 tbsp more milk.
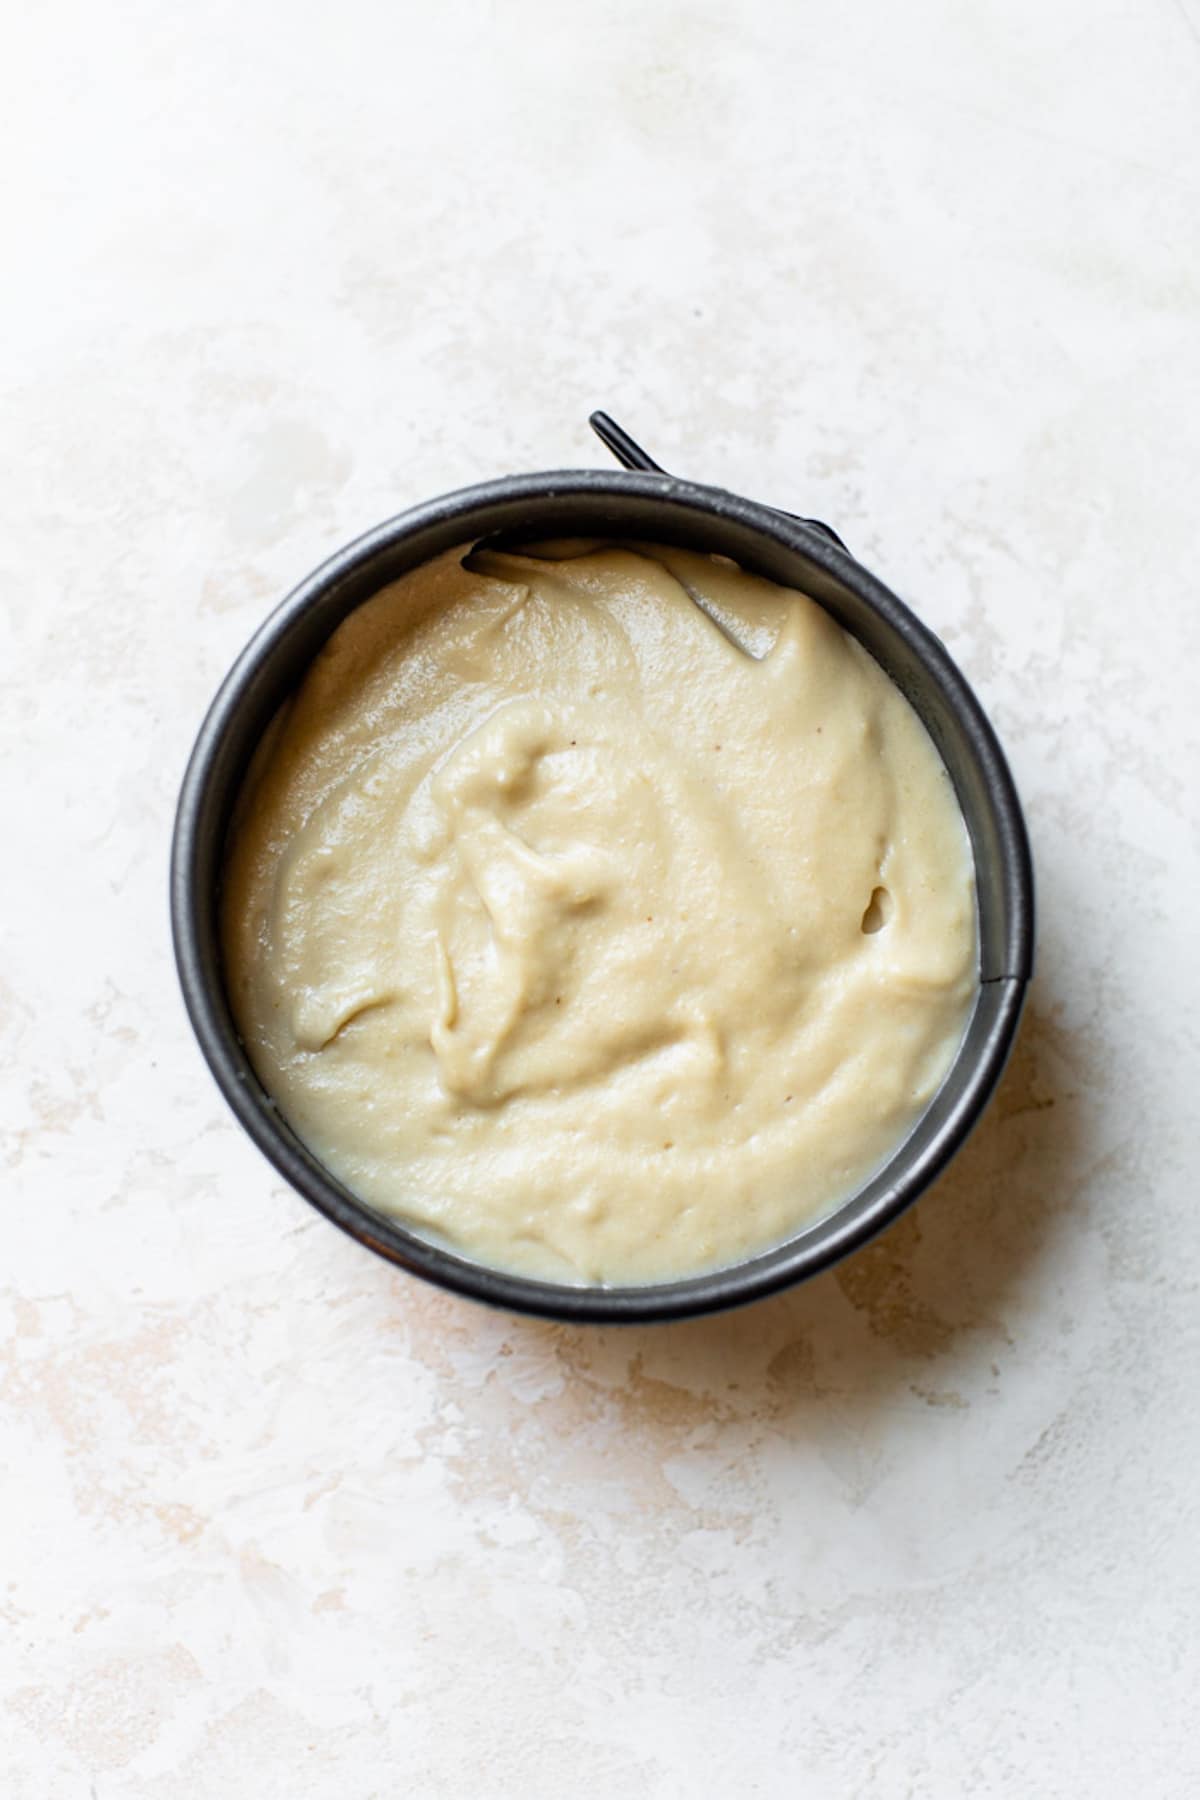
Step 4: Once the filling is smooth and creamy, use a spatula to scoop it out on and into the pans. Place the cheesecakes into the freezer for at least one hour, allowing them to solidify.
Tips & FAQs
- The most important tip of all is to use a springform pan! That way, it’s easy to remove the cheesecake and still keep it in tact.
- For this recipe, you can use two mini pans (4″) like I did, or one larger pan (8″) — both ways work and will yield the same results.
- You can use any sort of fruit for the topping, though personally I think berries (blueberries, blackberries, raspberries, strawberries) pair best with cheesecake.
How should I store this?
You’re going to want to store this vegan cheesecake in the refrigerator OR freezer. If you plan on eating it in a day or two, the refrigerator will be fine. However, if you’re making this ahead of time to eat at a later date, I’d store in the freezer. Then, before you want to eat it, remove it from the freezer and wait 10 minutes or so for it to thaw a bit.
More plant-based desserts
If you made this recipe, be sure to leave a comment and star rating below. Thanks!
No Bake Vegan Cheesecake

Video
Ingredients
for the crust:
- 1/2 cup walnuts
- 1/2 cup almonds
- 1 cup pitted dates
- 1/4 cup maple syrup
for the filling:
- 2 1/2 cup raw cashews*, soaked
- 1 tbsp lemon juice
- 1/3 cup almond milk
- 1/4 cup maple syrup
for the topping (optional):
- 1/2 cup frozen strawberries
- 2 tbsp lemon juice
- 1 tbsp cane sugar
Instructions
- Add walnuts and almonds to a food processor and pulse for 20 seconds. Then, add the dates and pulse for 20 seconds before finally adding in the maple syrup and pulsing until everything is combined.
- Grease two 4" springform pans or one 8" springform pan with coconut oil, then scoop the mixture out of the food processor and press it into the bottom of the pan(s); set aside.
- Next, make the filling: add cashews, lemon juice, milk, and syrup to a blender and blend until smooth. Scoop mixture out on top of the crust, using the back of a spoon or a spatula to smooth it out.
- For the topping: heat strawberries, lemon juice and sugar in a saucepan and simmer for 10 minutes until the strawberries are soft. Pour topping on top of cheesecake, then place the cheesecake in the freezer for at least an hour.
- Before serving, remove cheesecake from the freezer and wait 5-10 minutes before cutting.
Notes
Nutrition
UPDATE NOTE: This post was originally published in February 2020. It was updated with new text in June 2020.


How can I change this to a sugar free desert?
Hi! I’m not sure — I never intended for this recipe to be sugar-free, and I’m not an expert at sugar-free baking. You may want to reference a sugar-free desserts website instead 🙂
What’s binding it together? How does it hold up if it stays out at room temperature?
I don’t recommend keeping it out at room temperature for more than 20 minutes! Store it in the freezer or refrigerator, then bring it closer to room temperature so it’s easier to slice before serving.
Thank you for the recipe! I ran out of maple syrup so I used half honey and half syrup. The filling blended up nicely in my blendtec blender. I’m so excited to try it once it comes out of the freezer!
Hey Erin!
This vegan cheesecake looks so dreamy! I’m lickin my lips just looking at it. I especially like that the crust is made with nuts and maple syrup. I’m super excited at the idea of giving the recipe a try (hope tomorrow). Lucky me, I have all the ingredients at home.
Thank you so much for sharing this awesome idea and all of your precious tips. I hope they’ll help me avoid mistakes. Looking forward to your new fab recipes. I’m your real fan <3